How to Make a Cherry Tart
Every summer, my grandmother’s kitchen was filled with sweet smells. Her famous cherry tart was the star. I still remember watching her make the crust and arrange the cherries. It’s a memory that makes me want to share this classic recipe with you.
Making a cherry tart is more than a recipe. It’s about creating a moment of culinary magic. This recipe will help you make a dessert that looks great and tastes amazing. It’s perfect for both experienced bakers and beginners.
You’ll learn how to pick the best cherries and make a flaky crust. This tart will impress everyone. Get ready for a fun baking journey filled with tradition, flavor, and joy.
Table of Contents
Essential Ingredients for the Perfect Cherry Tart
Making delicious cherry tarts starts with picking the right ingredients. Success comes from knowing the key parts that turn simple items into a tasty dessert. The art of making great cherry tarts needs careful picking and preparing of ingredients.
Creating the perfect cherry tart recipe is more than just mixing ingredients. Each part is vital for flavor, texture, and taste.
Choosing the Right Type of Cherries
Your cherry choice can make or break the tart. Here are some options:
- Fresh cherries: Best in summer for vibrant flavor
- Frozen cherries: Good quality all year
- Canned tart cherries: Easy and very flavorful
Key Pastry Ingredients
A great tart needs the right ingredients for the crust:
- All-purpose flour: Gives structure
- Unsalted butter: Adds rich, flaky texture
- Granulated sugar: Adds a bit of sweetness
- Salt: Boosts flavor
Optional Flavor Enhancers
Make your cherry tarts even better with these:
- Almond extract: Goes well with cherry taste
- Lemon zest: Adds a bright, citrusy touch
- Vanilla bean: Brings depth and complexity
By choosing and mixing these ingredients carefully, you’ll make cherry tarts that look and taste amazing.
Tools and Equipment You’ll Need
Making a perfect cherry tart is more than just using great ingredients. The right tools can make a big difference. They help you create stunning cherry pie tartlets with precision.
Before you start making a cherry tart, you need some key kitchen equipment. The right tools make preparation easier and more fun.
Essential Baking Equipment
- Tart Pan: Choose between removable-bottom and fixed-bottom pans for your cherry tart. Removable-bottom pans make serving easier
- Rolling pin for creating perfect pastry crusts
- Pastry cutter or food processor for preparing dough
- Measuring cups and spoons for precise ingredient quantities
Cherry Preparation Tools
- Cherry pitter for quick and clean fruit preparation
- Large mixing bowls for combining filling ingredients
- Kitchen scale for accurate measurements
Optional but helpful equipment includes pastry weights for blind baking and a cooling rack. These tools help your cherry pie tartlets set perfectly. With these, you’ll make desserts that wow everyone.
Pro tip: Quality tools can significantly improve your baking results!
Making the Classic Cherry Tart Crust
Creating the perfect crust is key to a delicious cherry tart. A great crust can turn your cherry tarts into something special. It makes every bite a joy.
Mixing the Dough: The Essential Technique
When making your cherry tart, preparing the dough is vital. Start with cold ingredients for a flaky texture. Cold butter is essential for a light, crisp crust that pairs well with the sweet cherry filling.
- Use unsalted butter straight from the refrigerator
- Cut butter into small cubes before mixing
- Work quickly to keep ingredients cold
Rolling and Shaping with Precision
Rolling and shaping your cherry tarts needs patience and practice. Use a marble surface or a chilled countertop. This helps prevent the dough from warming up too fast.
“A perfect crust is the canvas for your culinary masterpiece” – Pastry Chef Expert
Pre-Baking for Crisp Perfection
Blind baking is crucial for a crisp bottom crust. Line your tart pan with parchment paper. Use pie weights to stop the crust from puffing up during baking.
- Preheat oven to 375°F
- Line crust with parchment paper
- Add pie weights or dried beans
- Bake for 15-20 minutes
Your carefully crafted crust is now ready for the cherry filling. It’s the start of an unforgettable dessert.
Preparing Your Cherry Filling
Making the perfect cherry tart filling is all about choosing and preparing your cherries. The type of cherries you pick will make or break your tart. Fresh cherries are ideal, but frozen or canned ones can also be tasty.
When picking cherries, keep these tips in mind:
- Go for ripe, deep-red tart cherries for the best taste
- Make sure to remove pits for a smooth filling
- Add a bit of lemon juice to balance the sweetness
To get a rich, thick filling, mastering thickening is key. Cornstarch and tapioca starch are great for this. Start with a little and add more as needed to avoid a sticky mess.
Adding flavor to your filling is also important. Think about these extras:
- Almond extract for a deeper flavor
- Vanilla bean for extra complexity
- Cinnamon for a warm touch
Cooking the filling needs patience. Let it simmer slowly, stirring often to avoid burning. Aim for a filling that’s thick, shiny, and holds its shape but stays moist.
Steps to Create the Perfect Cherry Tart
Making the ultimate cherry tart needs precision and care. Your cherry tart recipe will turn into a delicious dessert with the right steps. It’s all about combining your crust and cherry filling with the right techniques.
Assembling Your Cherry Pie Tartlets
Start your cherry tart assembly with these steps:
- Carefully spread the pre-chilled cherry filling evenly across the pre-baked crust
- Leave a small border around the edges to prevent overflow
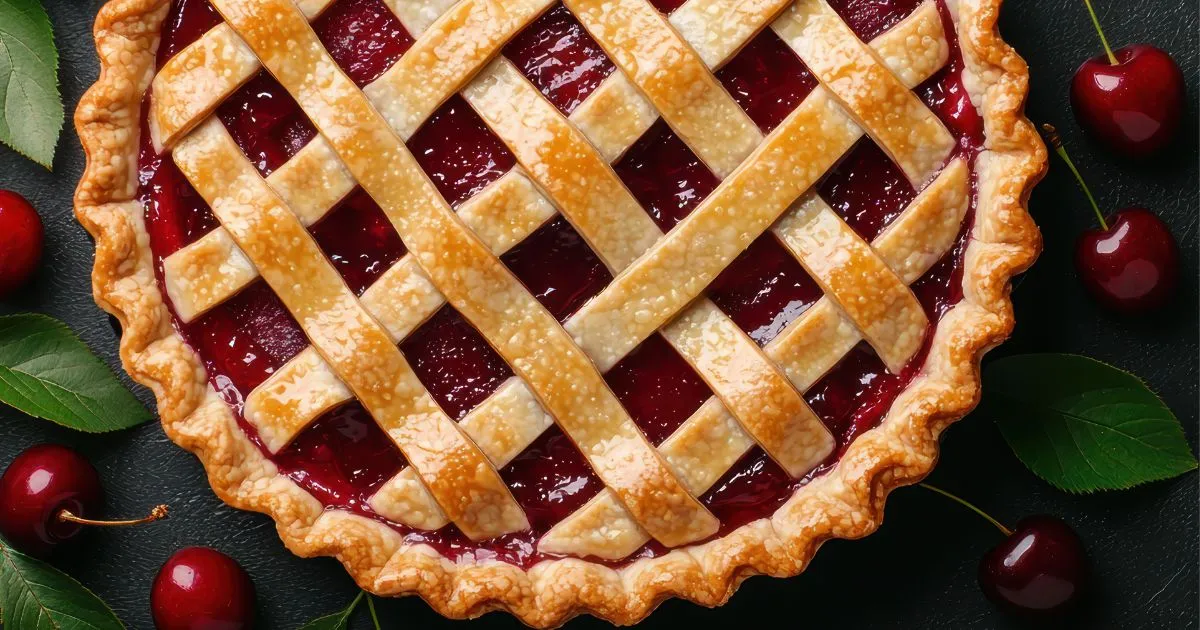
- Optional: Create a decorative lattice top or crumble topping for extra visual appeal
Mastering Baking Temperature and Timing
To bake your cherry pie tartlets perfectly, pay close attention. Preheat your oven to 375°F (190°C). Bake for about 35-45 minutes, watching to avoid over-browning.
Recognizing Tart Perfection
Your cherry tart is ready when you see these signs:
- Bubbling filling around the edges
- Golden-brown crust with a crisp look
- Slightly thickened cherry filling
Pro tip: Let your cherry tart cool for at least 30 minutes before serving. This helps the filling set and makes slicing easier, ensuring perfect cherry pie tartlets every time.
Common Mistakes to Avoid When Making Cherry Tarts
Making the perfect cherry tart needs care and focus. Many home bakers face issues that can ruin a dessert. Knowing these mistakes helps make great cherry tarts every time.
Several key errors can affect your tart’s quality:
- Dough Handling: Overworking the pie crust makes it tough. Handle your dough gently for a flaky crust.
- Moisture Management: Too much liquid can make the bottom soggy. Drain canned cherries well and dry fresh or frozen ones before using.
- Temperature Control: Wrong baking temperatures can cause uneven cooking or burnt crusts.
Choosing the right cherries is key. Not all cherries are the same. Sweet cherries are best for fresh tarts, while sour cherries add a deeper flavor.
Adjusting sweetness is also important. Always taste your cherries before adding sugar. Some cherries are sweeter, needing less sugar. This step can make your tart stand out.
Pro tip: A digital kitchen scale can help you measure ingredients precisely, reducing the chance of error in your cherry tarts.
Avoiding these mistakes will help you make stunning cherry tarts. They’ll impress everyone you share them with.
Storage and Serving Suggestions
Making the perfect cherry tart is just the start. Knowing how to store and serve it can make it even better. Whether you’ve baked a tart or have leftovers, storing and serving it right is key.
Proper Storage Methods
Your tart needs careful handling to keep its taste and texture great. Here are some tips for storing it:
- Room temperature storage: Keep the tart covered with a loose tent of aluminum foil for up to 2 days
- Refrigeration: Store in an airtight container for up to 4-5 days
- Avoid direct plastic wrap contact to prevent condensation
Serving Temperature Recommendations
The right serving temperature can really make your tart shine. Here are some serving tips:
| Serving Style | Temperature | Recommended Duration |
|---|---|---|
| Room Temperature | 60-70°F | 30-45 minutes after removal from refrigerator |
| Warm Serving | 115-120°F | 5-7 minutes in a preheated oven at 250°F |
Complementary Accompaniments
Make your tart even better with these pairings:
- Vanilla bean ice cream
- Freshly whipped cream
- Dusting of powdered sugar
By following these tips, your cherry tarts will stay delicious. They’ll be perfect every time you serve them.
Variations and Creative Twists on the Classic Cherry Tart
Make your cherry pie tartlets stand out with new ideas. Try different recipes for tart cherries to create unforgettable desserts. These will surprise and impress everyone.
Here are some fun cherry tart variations:
- Mini cherry pie tartlets for individual servings
- Chocolate-infused cherry tart crusts
- Gluten-free nut-based pastry alternatives
- Mixed fruit cherry combinations
Try different cherry types to change your tart’s taste. Here are some options:
| Cherry Type | Flavor Characteristics | Best Pairing |
|---|---|---|
| Bing Cherries | Sweet and rich | Dark chocolate crust |
| Montmorency Cherries | Tart and bright | Almond streusel topping |
| Rainier Cherries | Delicate and mild | Vanilla cream base |
Decorate your cherry pie tartlets to make them look amazing. Try lattice tops, streusel crumbles, or fresh mint leaves. This will make your dessert look stunning.
Pro tip: Always choose ripe, firm cherries for the most vibrant flavor and texture in your tart.
Remember, baking is an art of creativity. Don’t be afraid to experiment and make each cherry tart uniquely yours!
Conclusion
Making the perfect cherry tart is an art that needs both skill and love. Your journey through this recipe shows how quality ingredients and careful steps can make a simple dessert amazing. Every step you’ve learned makes you more confident in baking.
The beauty of a cherry tart is its ability to fit any occasion. It’s perfect for family gatherings, summer picnics, or fancy dinner parties. With your new skills, you can try different cherries, crusts, and flavors to match your taste.
Now, it’s time to use what you’ve learned. Start with the classic recipe and then try new things. Baking is about having fun, learning, and sharing yummy moments with loved ones. See each baking session as a chance to get better and enjoy delicious treats.
Your baking adventure is just starting. Get your ingredients ready, preheat the oven, and let your creativity shine with your homemade cherry tart.
FAQ
What type of cherries work best for a tart?
Sour cherries like Montmorency and sweet cherries like Bing are great for tarts. Fresh cherries are best, but frozen or canned ones work well too.
How do I prevent a soggy bottom in my cherry tart?
To avoid a soggy bottom, pre-bake your crust first. Use pie weights or dried beans. Also, drain any extra liquid from your cherries. A light dusting of breadcrumbs or nuts helps too.
Can I make a cherry tart ahead of time?
Yes, you can make a tart ahead. Store it at room temperature for 1-2 days or refrigerate for 4-5 days. Cover it loosely or use an airtight container. Let it come to room temperature before serving.
Is it necessary to pit cherries for a tart?
It’s best to pit cherries. Pitting makes eating more enjoyable and avoids dental problems. Use a cherry pitter or a small knife to remove pits.
What can I serve with a cherry tart?
Serve your tart with vanilla ice cream, whipped cream, or mascarpone. Coffee, tea, or Port wine are great drinks to pair with it. A sprinkle of powdered sugar or fresh mint adds to the presentation.
How do I know when my cherry tart is fully baked?
Check for a golden crust, bubbling filling, and a thickened consistency. The filling should be set but still slightly jiggly. The crust should be crisp, not pale or soggy.
Can I make a gluten-free cherry tart?
Yes! Use gluten-free flours like almond or coconut flour. Make sure all ingredients are gluten-free. You might need to adjust the liquid to get the right dough.
How long does it take to make a cherry tart?
It takes 1.5 to 2.5 hours to make. This includes making the crust, chilling, preparing the filling, and baking. Cooling time adds another 1-2 hours for the best taste.