Irresistible Chocolate Pudding Cake Recipe: How to Bake in 4 Easy Steps
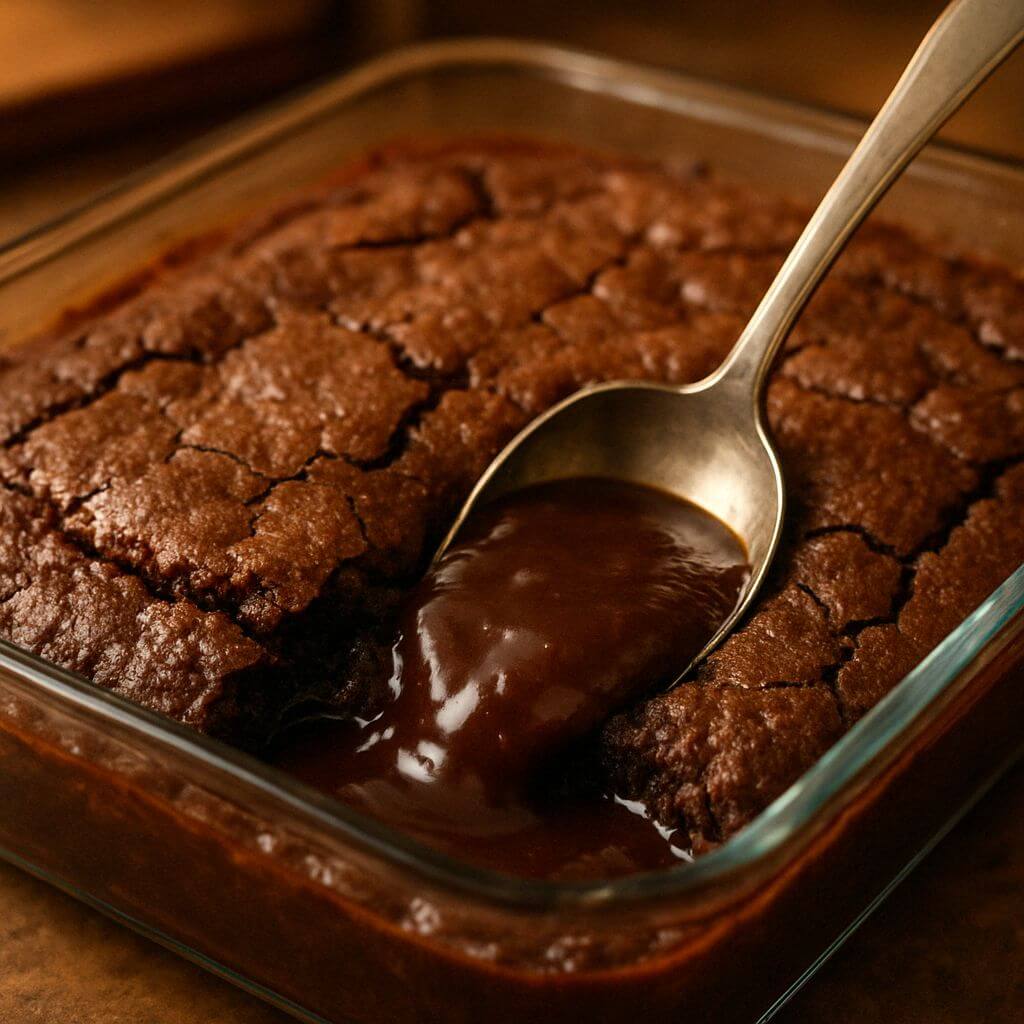
Have you ever wondered how some desserts magically create their own sauce while baking? The chocolate pudding cake is one of those kitchen miracles that seems to defy science. With just one batter, you’ll create a warm, fluffy cake on top and a rich, gooey pudding on the bottom. It’s like getting two desserts in one!
This chocolate pudding cake recipe is special because it creates two distinct layers while baking – no extra steps required! The cake rises to the top while the pudding sinks to the bottom, forming a delicious sauce. Best of all, this recipe takes just 15 minutes to prep and about 35 minutes to bake, making it perfect for weeknight treats or last-minute dessert emergencies.
Don’t worry if you’re new to baking – this recipe is beginner-friendly. The difficulty level is easy, with simple ingredients and straightforward steps. Even kids can help make this magical dessert!
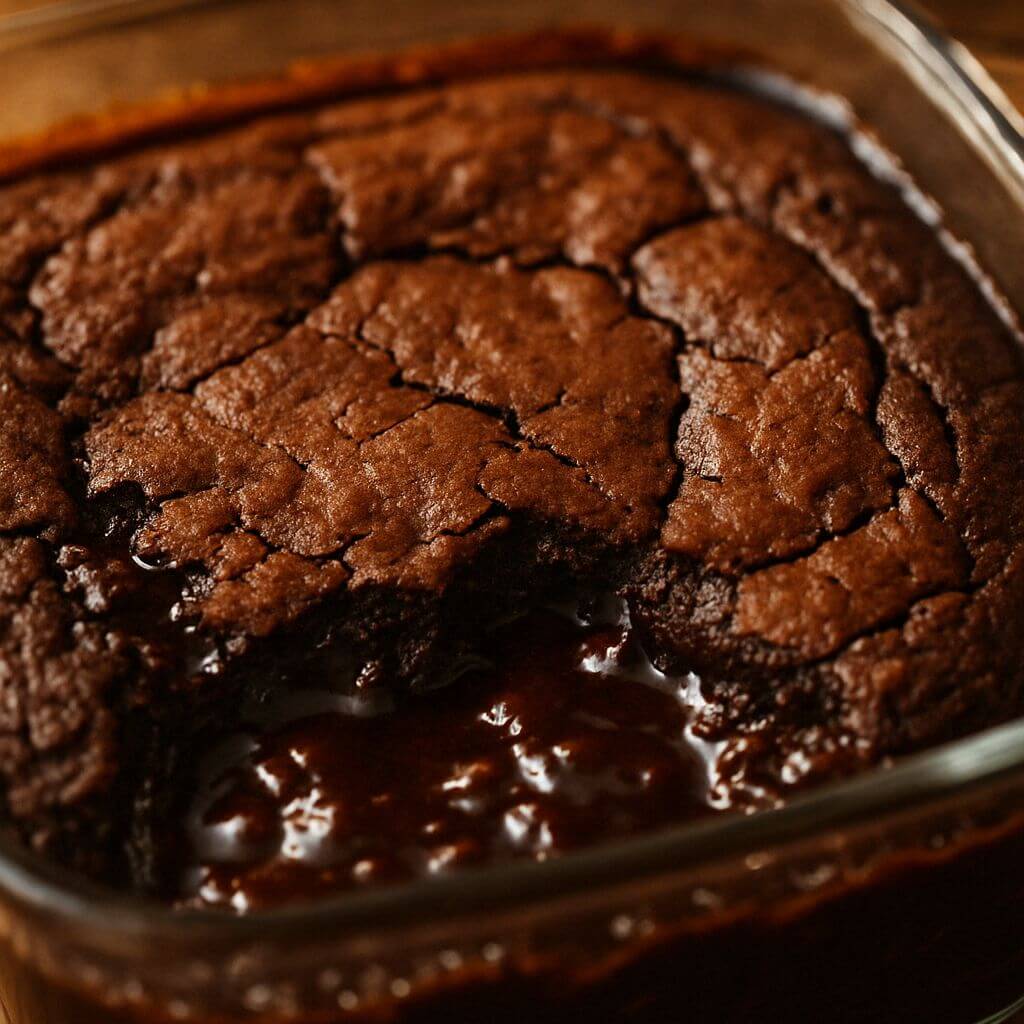
Table of Contents
Essential Ingredients
To make a delicious chocolate pudding cake, you’ll need:
For the cake batter:
- 1 cup all-purpose flour
- 3/4 cup granulated sugar
- 2 tablespoons unsweetened cocoa powder
- 2 teaspoons baking powder
- 1/4 teaspoon salt
- 1/2 cup milk
- 2 tablespoons vegetable oil
- 1 teaspoon vanilla extract
For the pudding layer:
- 3/4 cup brown sugar
- 1/4 cup unsweetened cocoa powder
- 1 1/2 cups hot water
Why These Ingredients Matter
- Flour forms the structure of your cake.Be sure to measure it accurately by spooning it into the measuring cup and leveling off the top.
- Cocoa powder provides that rich chocolate flavor. Use unsweetened cocoa powder, not hot chocolate mix (which contains sugar and other additives).
- Baking powder helps the cake rise. Make sure yours is fresh – if it’s older than 6 months, consider replacing it.
- Brown sugar in the pudding layer creates a caramel-like flavor that complements the chocolate.
- Hot water activates the pudding layer magic! The heat helps the sugar and cocoa melt together.
Substitutions and Variations
- Gluten-free option: Substitute the all-purpose flour with a 1:1 gluten-free flour blend.
- Dairy-free alternative: Substitute regular milk with almond milk, oat milk, or any other plant-based milk.
- Sugar alternatives: You can replace granulated sugar with coconut sugar for a different flavor. For the brown sugar, date sugar makes a good substitute.
- Oil options: If you don’t have vegetable oil, you can use melted butter, coconut oil, or even applesauce for a lower-fat version.
Step-by-Step Instructions
Step 1: Prepare Your Baking Dish and Oven
- Preheat your oven to 350°F (175°C).
- Lightly grease an 8×8 inch baking dish or a 9-inch round cake pan.
- Set aside while you prepare the batter.
Tip: A glass baking dish works best as it allows you to see the pudding layer forming at the bottom.
Step 2: Make the Cake Batter
- In a medium bowl, whisk together the flour, granulated sugar, 2 tablespoons cocoa powder, baking powder, and salt.
- In a separate smaller bowl, mix the milk, oil, and vanilla extract.
- Add the wet ingredients to the dry ingredients.
- Stir until just combined. Don’t overmix – a few small lumps are okay!
- Spread the batter evenly in your prepared baking dish.
Tips for Success:
- The batter will be thick – that’s normal!
- Use a rubber spatula to spread the batter evenly in the pan.
- Gently tap the pan on the counter to release any air bubbles.
Step 3: Create the Pudding Layer
- In a small bowl, mix together the brown sugar and 1/4 cup cocoa powder.
- Sprinkle this mixture evenly over the cake batter.
- Heat the water until very hot (just below boiling).
- Carefully pour the hot water over everything.
- DO NOT STIR – this is very important!The water and sugar mixture may appear unusual sitting on top, but trust the process—it’ll come together.
Tip: Pour the hot water over the back of a spoon to disperse it gently and avoid creating holes in your batter.
Step 4: Bake to Perfection
- Carefully place the baking dish in the preheated oven.
- Bake for 35-40 minutes, until the top looks set and slightly cracked.
- The cake is done when the top springs back lightly when touched.
- Let it cool for 15 minutes before serving.
Baking Tips:
- Place your baking dish on a cookie sheet before putting it in the oven to catch any potential overflow.
- The cake will still look a bit jiggly in the center when done – that’s the pudding layer working its magic!
- Don’t overbake, or the pudding layer will dry out.
Assembly and Presentation
While this chocolate pudding cake doesn’t require traditional assembly (it assembles itself in the oven!), there are several ways to make it look and taste even better:
Serving Suggestions:
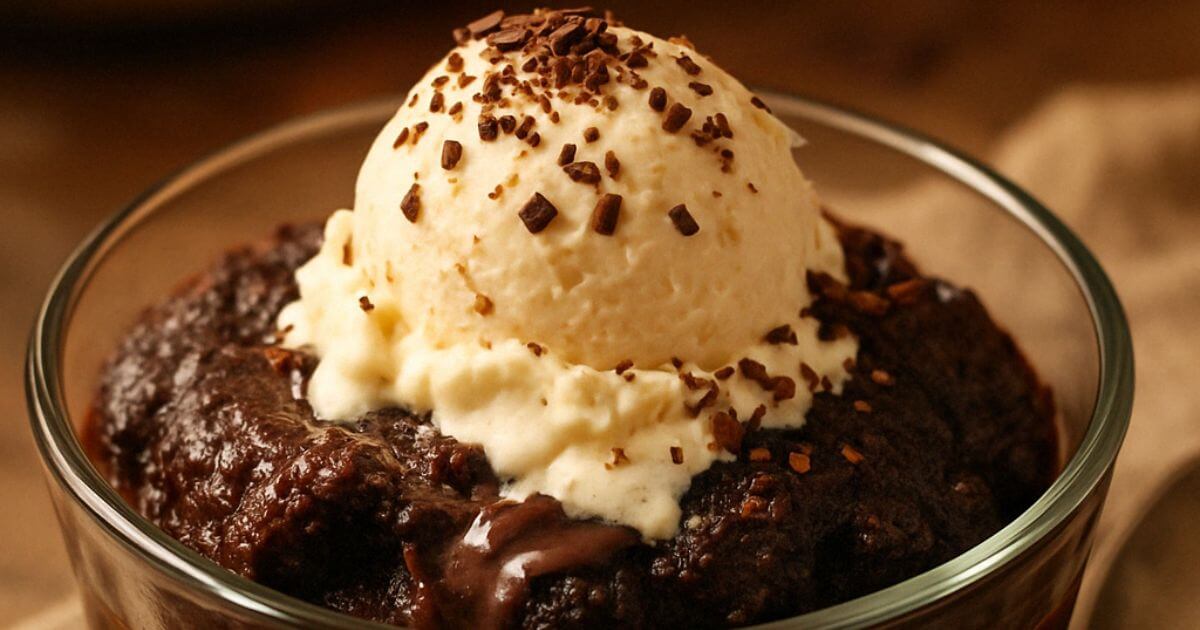
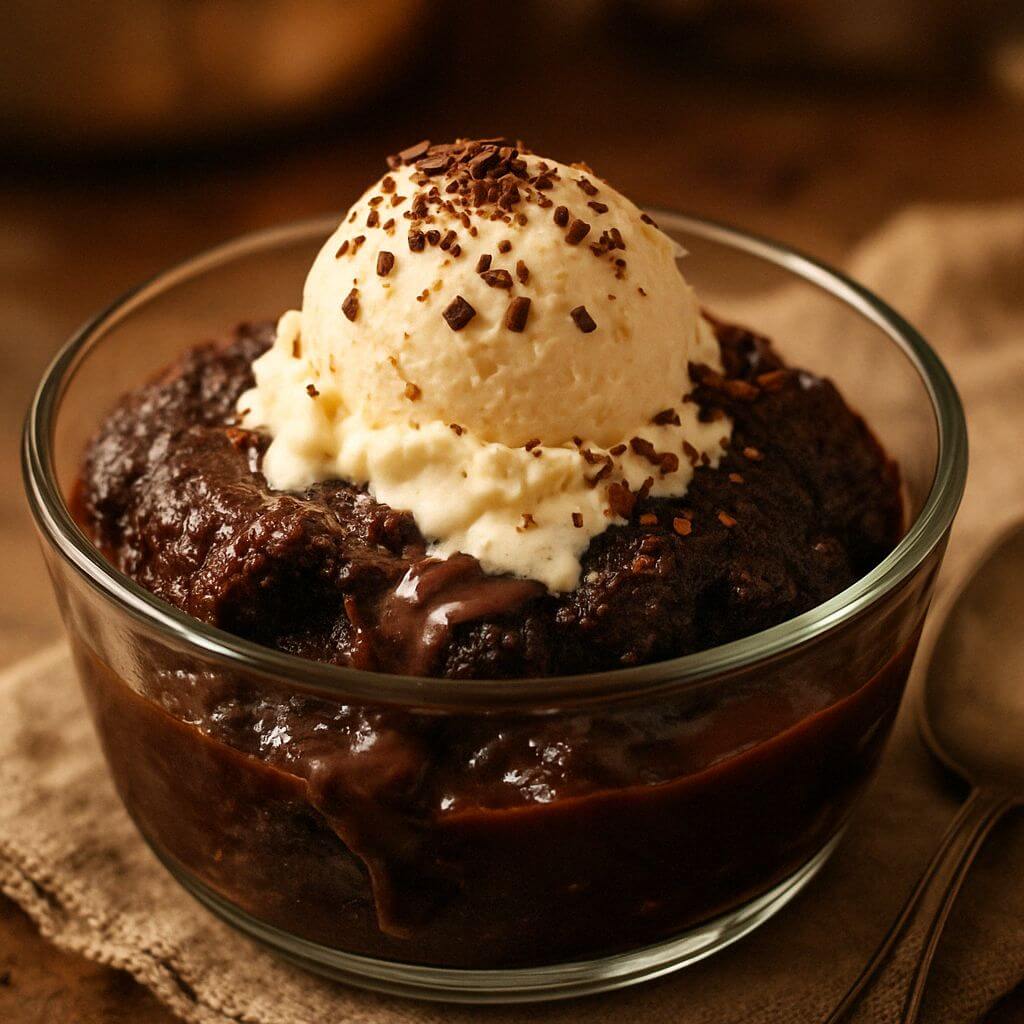
- Scoop the warm cake into bowls, making sure to get some of the pudding sauce from the bottom.
- Top with a scoop of vanilla ice cream for a classic hot-and-cold dessert experience.
- Add a dollop of whipped cream and some chocolate shavings for an elegant touch.
- Sprinkle with powdered sugar for a simple but pretty presentation.
- Add fresh berries like raspberries or strawberries for color and a fruity contrast.
Presentation Tips:
- Serve in clear glass bowls to show off the two distinct layers.
- Warm plates before serving to keep the dessert hot longer.
- Drizzle with caramel sauce for an added touch of decadence,
- Add garnish with a sprig of mint for a burst of color.
Storage and Make-Ahead Tips
This chocolate pudding cake is best enjoyed warm from the oven, but you can still prepare components ahead of time and store leftovers properly.
Make-Ahead Options:
- Mix the dry ingredients for the cake and store in an airtight container or ziplock bag for up to 1 month.
- Mix the brown sugar and cocoa for the pudding layer and store separately.
- When ready to bake, just add the wet ingredients and proceed with the recipe.
Storage Tips:
- Cover leftovers with plastic wrap or transfer to an airtight container.
- Refrigerate for up to 3 days.
- The cake will absorb more of the pudding sauce as it sits, changing the texture but still tasting delicious.
Reheating Instructions:
- Individual portions: Microwave for 30-45 seconds until warm.
- Whole leftover cake: Cover with foil and warm in a 300°F oven for about 15 minutes.
- Add a tablespoon of water before reheating if the cake seems dry.
Recipe Variations
One of the best things about this chocolate pudding cake recipe is how versatile it is! Here are some creative variations to try:
Flavor Twists:
- Mocha Pudding Cake: Add 1 tablespoon of instant coffee powder to the cake batter.
- Mint Chocolate: Add 1/2 teaspoon of mint extract to the batter and sprinkle with mini chocolate chips.
- Mexican Chocolate: Add 1 teaspoon of cinnamon and a pinch of cayenne pepper to the dry ingredients.
- Peanut Butter Swirl: Drop spoonfuls of peanut butter on top of the batter before adding the sugar mixture.
- Orange Chocolate: Add the zest of one orange to the cake batter for a bright citrus note.
Texture Additions:
- Nutty Delight: Add 1/2 cup chopped walnuts or pecans to the batter.
- Chocolate Chip: Fold in 1/3 cup mini chocolate chips into the batter.
- Berry Good: Add 1 cup of fresh or frozen berries on top of the batter before adding the pudding layer.
Special Diet Versions:
- Vegan Chocolate Pudding Cake: Use plant milk, substitute flax egg for binding, and use coconut oil.
- Whole Grain: Replace half the all-purpose flour with whole wheat pastry flour.
- Reduced Sugar: Cut the sugar by 1/4 cup and add an extra teaspoon of vanilla for flavor.
Conclusion
This magical chocolate pudding cake proves that baking doesn’t have to be complicated to be impressive. With just four easy steps and simple ingredients most of us have in our pantry, you can create a warm, comforting dessert that will have everyone asking for seconds.
What makes this recipe great is how easily it can be customized. Don’t be afraid to experiment with different flavors, add-ins, or toppings to make it your own. Whether you’re a beginner baker or a seasoned pro, this chocolate pudding cake is sure to become a favorite in your recipe collection.
So the next time you’re craving something sweet, skip the box mixes and complicated recipes. Instead, try this simple yet magical chocolate pudding cake that bakes its own sauce. Your taste buds (and your dinner guests) will thank you!
FAQ:
Q: Why did my cake sink in the middle? A: This is actually normal for chocolate pudding cake! The center should be a bit lower than the edges because that’s where most of the pudding layer forms. If it sank too much, your oven temperature might be too low or the cake was underbaked.
Q: Can I make this recipe ahead for a party? A: This cake is best served warm, within an hour of baking. You can mix the dry ingredients ahead of time, but I recommend baking it shortly before serving for the best texture and temperature contrast.
Q: Is chocolate pudding cake healthy? A: While this dessert contains sugar and carbohydrates, it’s lower in fat than many frosted cakes. You can make healthier substitutions like whole wheat flour or reducing the sugar slightly. Remember, desserts are meant to be enjoyed in moderation as part of a balanced diet!
Q: Is it possible to double this recipe for a bigger crowd? A: Yes! Double all ingredients and bake in a 9×13 inch pan. You may need to increase baking time by 5-10 minutes, but watch carefully.
Q: Why do I need to pour hot water over the top? A: The hot water is the magic ingredient that creates the pudding layer! As the cake bakes, the hot water, cocoa, and sugar mixture sinks to the bottom, creating a delicious sauce under the cake.
Q: My pudding layer seems thin. What went wrong? A: Make sure your water is very hot (just below boiling) when you pour it over the cake. Also, don’t disturb or mix after adding the water. Finally, check that your oven temperature is accurate with an oven thermometer.
Q: Can I make this in individual ramekins? A: Yes! Divide the batter among 6-8 ramekins, sprinkle with the sugar mixture, and carefully add the hot water. Reduce baking time to about 20-25 minutes.

