Mini Chocolate Chip Cookies: How to Bake Them Just Right
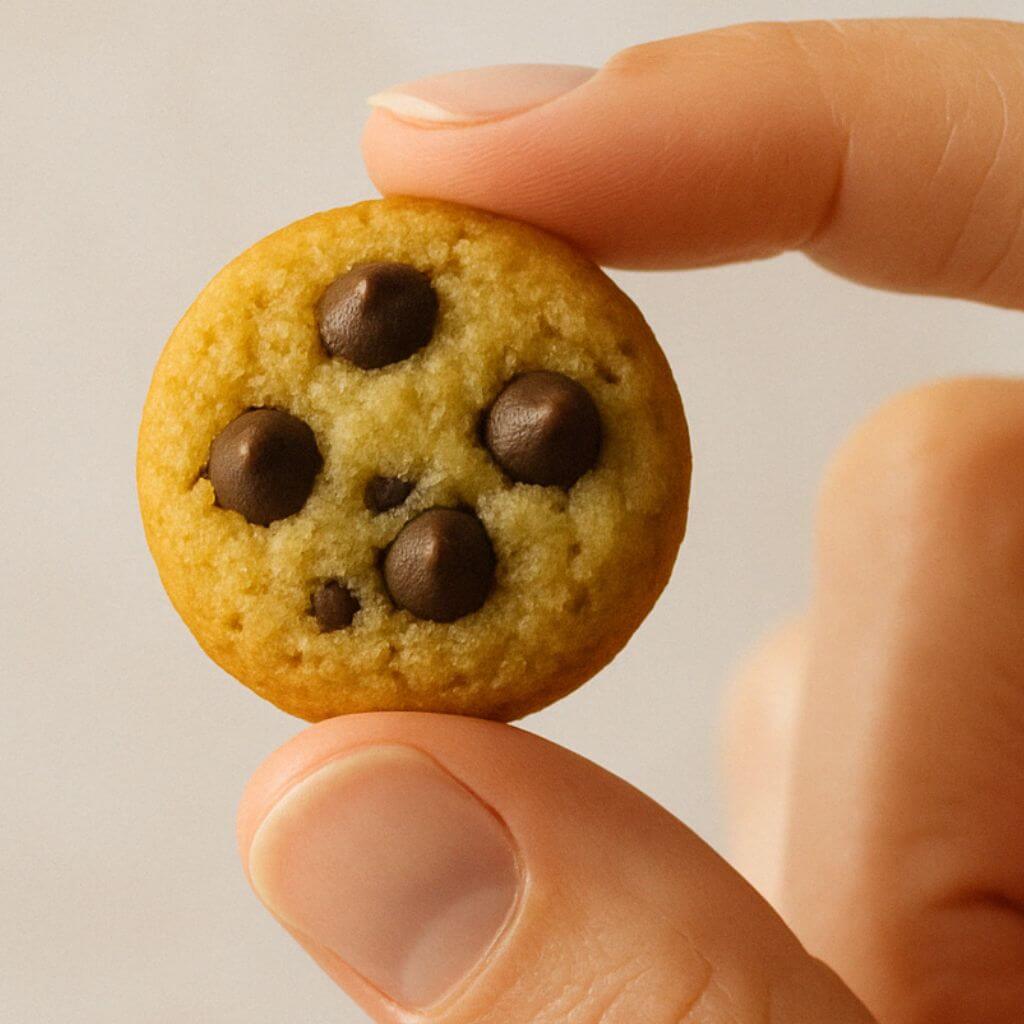
There’s something irresistibly charming about mini chocolate chip cookies. Perhaps it’s the way they perfectly fit between your fingertips, or how they offer the ideal cookie-to-chocolate ratio in each tiny, delectable bite. My earliest memory of these diminutive delights takes me back to my grandmother’s kitchen, where a cooling rack filled with dozens of quarter-sized cookies would greet me after school. “Small treasures bring the biggest smiles,” she’d say, watching my eyes widen at the sight of those perfectly golden morsels.
Mini chocolate chip cookies aren’t just scaled-down versions of their larger counterparts—they’re an entirely different experience. They offer a satisfying crispness that’s harder to achieve with standard-sized cookies, and their bite-sized nature makes them perfect for snacking, gifting, or adorning desserts. In this guide, I’ll share everything you need to know about creating these tiny treasures, from the perfect dough consistency to baking techniques that ensure they’re neither underbaked nor overly crisp.
The Tiny Cookie with a Big History
The chocolate chip cookie itself has a well-documented history, dating back to 1938 when Ruth Wakefield, owner of the Toll House Inn in Massachusetts, first created what was then called the “Toll House Chocolate Crunch Cookie.” The mini version emerged in the post-World War II era, when home entertaining became increasingly popular and hosts sought daintier offerings for tea parties and social gatherings.
By the 1960s, mini cookies had become commercially available, but bakers quickly realized these tiny treats were particularly delicious when homemade. The smaller size allowed for a higher ratio of crispy edges to chewy centers, creating a textural experience that many cookie enthusiasts preferred over standard sizes.
Today, mini chocolate chip cookies have found their place in everything from children’s lunchboxes to elegant dessert platters at weddings. Their versatility and universal appeal have cemented their status as a beloved classic that continues to evolve with creative variations and techniques.
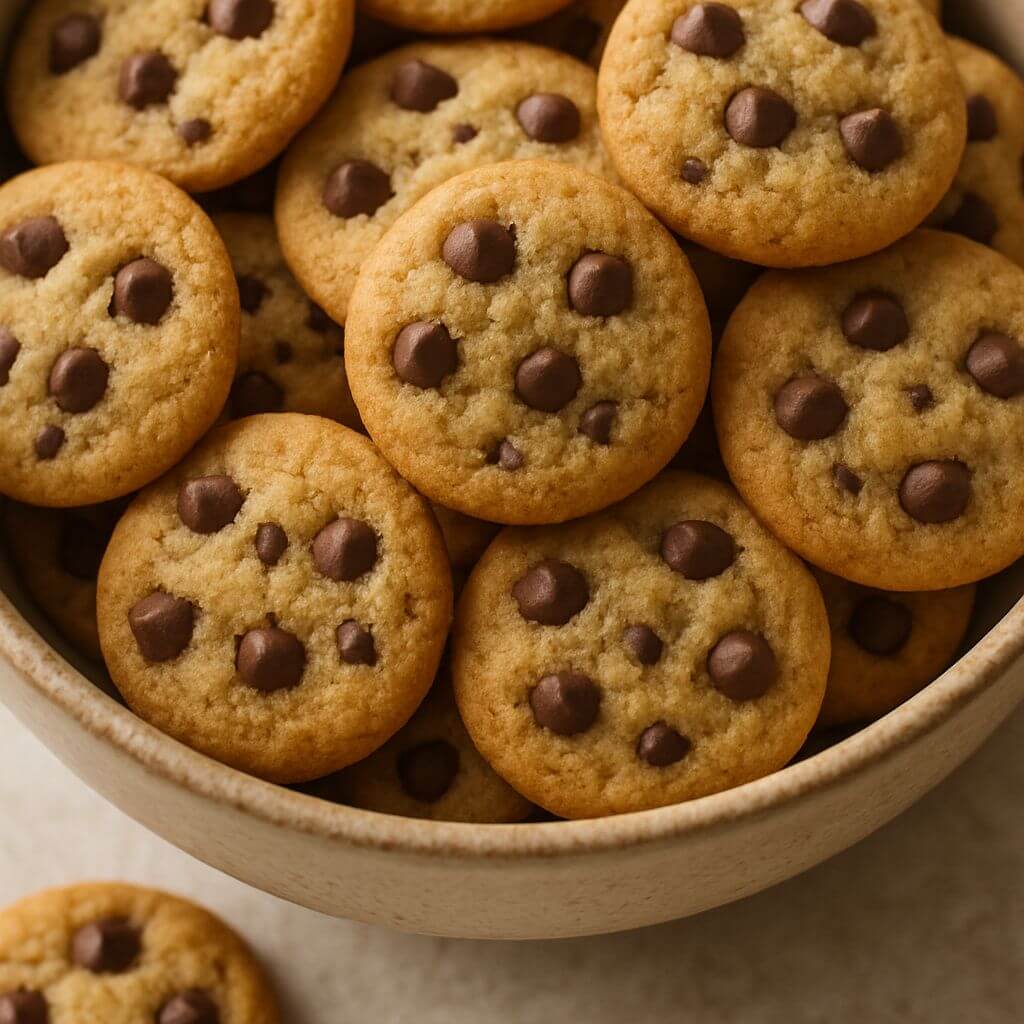
Table of Contents
Perfect Ingredients for Perfect Mini Cookies
The charm of mini chocolate chip cookies lies in their simplicity, but each ingredient plays a crucial role in achieving that perfect balance of flavor and texture:
Essential Ingredients:
- All-purpose flour (1½ cups): The backbone of your cookie structure. For mini cookies, sifting is particularly important to avoid lumps that could affect the cookie’s small structure.
- Unsalted butter (½ cup, softened): Provides richness and helps create those crispy edges. Room temperature butter is crucial for proper creaming with sugar.
- Granulated sugar (¼ cup): Contributes to crispness and helps cookies spread slightly during baking.
- Light brown sugar (½ cup, packed): Adds moisture, chewiness, and caramel notes that complement the chocolate.
- Egg (1 large, room temperature): Binds ingredients together and adds structure. For mini cookies, the egg should be thoroughly incorporated but not over-beaten.
- Vanilla extract (1 teaspoon): Enhances all flavors and adds aromatic depth.
- Mini chocolate chips (¾ cup): Regular chips can overwhelm mini cookies, so mini chips provide better distribution. Use high-quality chocolate for the best flavor.
- Salt (¼ teaspoon): Balances sweetness and enhances flavor complexity.
- Baking soda (½ teaspoon): Provides just enough lift while allowing cookies to spread appropriately.
Ingredient Quality Matters
When working with mini cookies, ingredient quality becomes even more noticeable. Since each bite contains less material, every flavor note stands out. Consider investing in premium butter with higher fat content and pure vanilla extract rather than imitation vanilla. For chocolate, choose chips with a cocoa content between 55-70% for balanced sweetness and rich chocolate flavor that won’t overwhelm the small cookies.
Essential Equipment for Mini Cookie Success
Before diving into the preparation, gather these tools for the best results:
- Stand mixer or hand mixer: For properly creaming butter and sugar
- Small cookie scoop (1 teaspoon size): Ensures uniform cookie size
- Parchment paper: Prevents sticking and promotes even browning
- Light-colored baking sheets: Dark sheets can lead to over-browning, especially crucial for tiny cookies
- Cooling rack: Allows airflow around cookies to stop the baking process
- Kitchen scale (optional but helpful): For precise measurements
Step-by-Step Mini Chocolate Chip Cookie Preparation
Step 1: Prepare Your Ingredients and Equipment
Preheat your oven to 350°F (175°C). Line baking sheets with parchment paper. Ensure all refrigerated ingredients are at room temperature, especially the butter and egg.
Step 2: Mix Dry Ingredients
In a medium bowl, whisk together the flour, salt, and baking soda. This even distribution is particularly important for mini cookies, where any pockets of baking soda could affect a larger proportion of the cookie.
Step 3: Cream Butter and Sugars
In a stand mixer fitted with the paddle attachment (or using a hand mixer), cream the softened butter, granulated sugar, and brown sugar at medium speed for 2-3 minutes until light and fluffy. The mixture should lighten in color and increase slightly in volume. Don’t rush this step—proper creaming creates the foundation for your cookie’s texture.
Step 4: Add Egg and Vanilla
Add the room-temperature egg and vanilla extract. Beat until just combined, about 30-45 seconds. Scrape down the sides of the bowl to ensure even mixing.
Step 5: Incorporate Dry Ingredients
With the mixer on low speed, gradually add the dry ingredient mixture until just combined. Overmixing at this stage can cause excessive gluten development, leading to tough cookies.
Step 6: Fold in Chocolate Chips
Using a rubber spatula, gently fold in the mini chocolate chips until evenly distributed throughout the dough.
Step 7: Chill the Dough
This step is optional but highly recommended: chill the dough for 30 minutes. This firms up the butter and allows the flour to fully hydrate, resulting in cookies that spread less during baking—a key factor for maintaining the mini size.
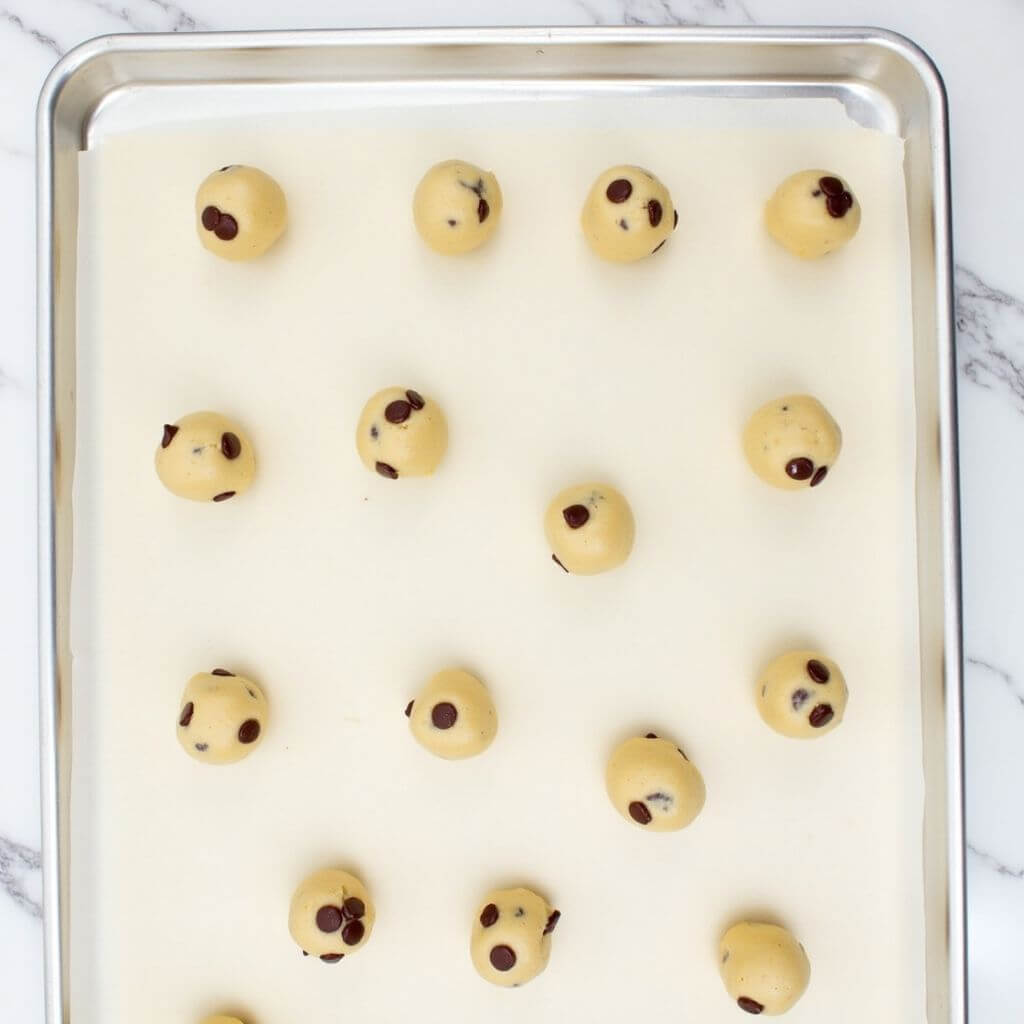
Step 8: Form Cookie Dough Balls
Using a 1-teaspoon cookie scoop, portion the dough into small, uniform balls. Place them on the prepared baking sheets, leaving about 1½ inches between each cookie. For mini cookies, spacing is crucial to prevent merging during baking.
Step 9: Bake to Perfection
Bake for 6-8 minutes, until the edges are just turning golden while the centers still appear slightly underdone. Remember that mini cookies bake much faster than regular-sized ones, so watch them closely after the 5-minute mark.
Step 10: Cool Properly
Allow cookies to rest on the baking sheet for 2 minutes before transferring to a cooling rack. This brief resting period allows them to set up enough to move without breaking.

Secret Techniques for Perfect Mini Chocolate Chip Cookies
The Perfect Mini Cookie Texture
The ideal mini chocolate chip cookie offers a delicate balance: crisp edges with a slightly softer center. To achieve this:
- Use the right pan: Light-colored, aluminum baking sheets distribute heat more evenly than dark ones, which can cause over-browning.
- Watch your timing: Mini cookies can go from perfect to overdone in less than a minute. Start checking at 6 minutes and look for golden edges with centers that appear slightly underdone.
- Rotate halfway: For even baking, rotate your pan 180° halfway through the baking time.
- The tap test: If you’re unsure about doneness, gently tap the edge of a cookie—it should feel set while the center still has slight give.
Common Mini Cookie Pitfalls to Avoid
- Dough too warm: If your kitchen is hot or your butter was too soft, chill the shaped dough balls for 10 minutes before baking to prevent excessive spreading.
- Inconsistent sizing: Even small variations become noticeable with mini cookies. Using a proper measuring scoop ensures uniform baking.
- Overcrowding the pan: Mini cookies need space to spread slightly. Crowding leads to uneven baking and cookies that merge together.
- Overbaking: Mini cookies continue to firm up as they cool. Remove them when the edges are golden but centers look slightly underdone.
Creative Variations on the Classic Mini Cookie
Once you’ve mastered the basic mini chocolate chip cookie, try these delightful variations:
Seasonal Adaptations
- Fall Spiced Mini Cookies: Add ¼ teaspoon cinnamon, a pinch of nutmeg.
- Holiday Minis: Fold in crushed peppermint pieces with white chocolate chips instead of semi-sweet.
- Spring Celebration: Add 1 teaspoon of fresh lemon zest and substitute white chocolate chips for a bright, fresh flavor.
Dietary Accommodations
- Gluten-Free Mini Cookies: Substitute a high-quality 1:1 gluten-free flour blend. The small size of mini cookies makes them less likely to become gritty or crumbly than larger gluten-free cookies.
- Vegan Option: Replace butter with plant-based butter sticks (not spread), use a flax egg (1 tablespoon ground flaxseed mixed with 2.5 tablespoons water), and select dairy-free chocolate chips.
- Reduced Sugar: Cut granulated sugar to 2 tablespoons and use ⅓ cup brown sugar. The smaller size means you’ll still get enough sweetness in each bite.
Flavor Twists
- Triple Chocolate Minis: Use a mix of mini semi-sweet, milk, and white chocolate chips.
- Nutty Addition: Fold in 2 tablespoons of very finely chopped toasted pecans or walnuts.
- Sea Salt Finish: Sprinkle a few flakes of fleur de sel on cookies immediately after baking for a sophisticated sweet-salty contrast.
Proper Storage for Lasting Freshness
Mini cookies tend to dry out faster than their larger counterparts due to their higher surface area-to-volume ratio. Here’s how to keep them fresh:
Short-Term Storage (1-3 days)
Store in an airtight container at room temperature with a slice of bread to maintain moisture. Separate layers with parchment paper to prevent sticking.
Extended Storage (up to 1 week)
For longer freshness, add a small piece of apple or a brown sugar saver to your airtight container. The natural moisture will keep cookies from becoming too crisp.
Freezing Options
Mini cookies freeze exceptionally well, both as dough and as baked cookies:
- Unbaked dough: Form dough balls, freeze on a tray until solid, then transfer to a freezer bag. Bake directly from frozen, adding 1-2 minutes to the baking time.
- Baked cookies: Once completely cooled, layer with parchment paper in an airtight container. Freeze for up to 3 months. Thaw at room temperature for 30 minutes before serving.
Serving Suggestions and Perfect Pairings
Elegant Presentation Ideas
- Cookie Towers: Stack mini cookies in diminishing circles to create a cookie “tree” for special occasions.
- Dessert Plate Accents: Use mini cookies as garnishes alongside ice cream, mousse, or other plated desserts.
- Cookie Bouquets: Thread cookies onto food-safe sticks and arrange in a decorative container for gifting.
Beverage Pairings
- Coffee Companions: The chocolate pairs wonderfully with medium-roast coffee, bringing out nutty notes in both.
- Tea Selections: Try Earl Grey tea, where the bergamot complements the vanilla in the cookies.
Kid-Friendly Serving Ideas
- Mini Cookie Ice Cream Sandwiches: Place a small scoop of vanilla ice cream between two cookies for a perfectly proportioned treat.
- Cookie Crumbles: Crush mini cookies as a topping for pudding cups or yogurt parfaits.
- Lunchbox Portions: Pack three to five mini cookies in small containers for an appropriately sized sweet treat.
Why Mini Chocolate Chip Cookies Deserve a Place in Your Recipe Collection
There’s something inherently joyful about miniature versions of our favorite foods. Mini chocolate chip cookies deliver all the comfort and satisfaction of their full-sized counterparts with added versatility and charm. Their quick baking time makes them perfect for last-minute gatherings, and their small size lets you enjoy a sweet treat without overindulgence.
These tiny treasures connect us to the simple pleasures of baking—the warm aroma filling your kitchen, the satisfaction of seeing rows of perfect golden cookies cooling on a rack, and the delight of sharing something made with care. Whether you’re an experienced baker or trying your hand at cookies for the first time, these mini marvels are sure to bring outsized joy to anyone lucky enough to taste them.
I encourage you to try this recipe, experiment with variations that speak to your taste preferences, and share the results with those you love. After all, good things do come in small packages—especially when they’re warm from the oven and studded with chocolate!
FAQ:
What causes my mini cookies to spread too much while baking?
This commonly happens when butter is too warm or there’s too little flour in your dough. Chilling the dough for 30 minutes before baking helps prevent excessive spreading.. Also, make sure your baking soda is fresh, as old leavening agents can affect cookie spread.
Is it possible to prepare mini chocolate chip cookies in advance for an event?
Absolutely! You have two great options: either prepare the dough up to 3 days ahead and refrigerate until ready to bake, or bake the cookies up to 5 days before your event and store in an airtight container. For maximum freshness, you can also freeze baked cookies for up to 3 months and thaw the day of your event.
What makes mini chocolate chip cookies different from just using less dough for regular cookies?
Mini chocolate chip cookies aren’t simply smaller portions of standard cookie dough. Their size creates a different texture profile with a higher ratio of crispy exterior to soft interior. They also bake differently, requiring less time at the same temperature, and the distribution of chocolate and other ingredients needs to be more precise for balanced flavor in each tiny bite.
How can I make my mini cookies perfectly round?
For picture-perfect round cookies, use a small cookie scoop for consistent sizing. If your cookies come out slightly irregular after baking, you can “round” them by placing a round cookie cutter or glass slightly larger than the cookie around each one and gently swirling it to reshape the cookie while still warm from the oven.
Do I need to use mini chocolate chips, or can I substitute regular chips instead?
While you can use regular chocolate chips chopped into smaller pieces, mini chocolate chips provide better distribution throughout the small cookies. Using standard chips often results in some cookies having too much chocolate and others too little. If you must use regular chips, chop them coarsely first for more consistent results.
How do I know when mini cookies are done baking without overbaking them?
Mini cookies are done when the edges are set and lightly golden while the centers still look slightly underdone. They will keep cooking from the residual heat after being taken out of the oven. A good visual cue is a matte (not shiny) finish on top with just a hint of golden color around the edges. For most ovens, this happens between 6-8 minutes at 350°F.
Can I add nuts to mini chocolate chip cookies?
Yes, but they must be very finely chopped—much smaller than you would for regular cookies. Large nut pieces can overwhelm the structure of mini cookies. Aim for pieces no larger than 1/8 inch, and reduce the amount to about 2-3 tablespoons for the recipe to maintain the proper dough consistency.
Need more Cookies recipes? Try these:
Oreo Stuffed Chocolate Chip Cookies