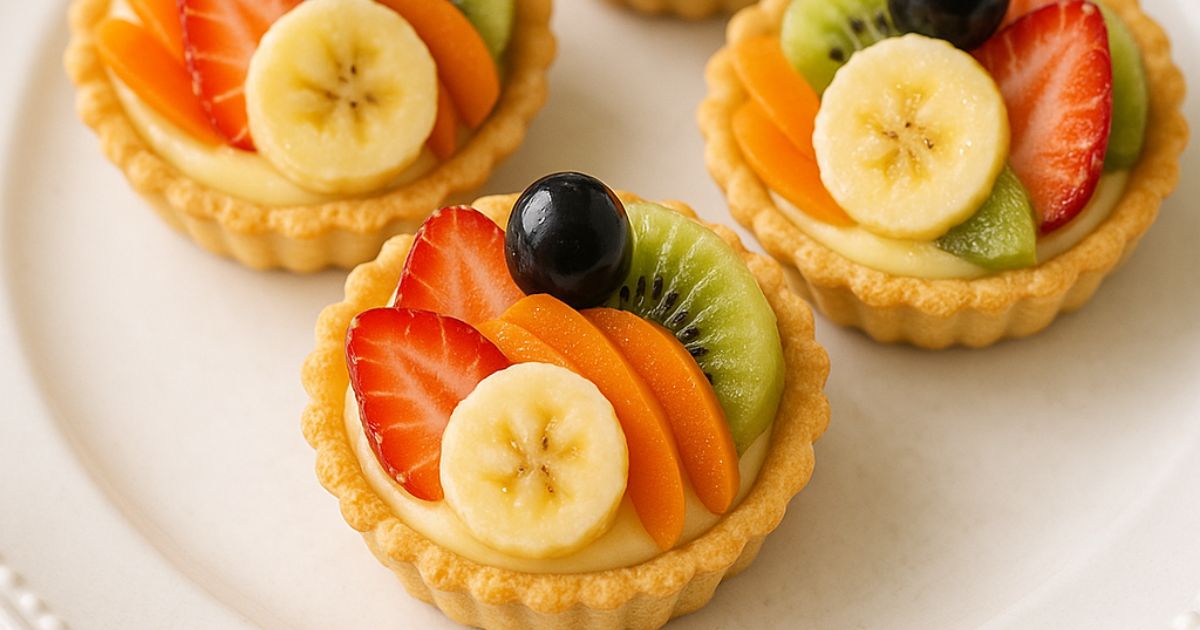
Mini Fruit Tart: 5 Easy Steps To A Bakery-Style Dessert
Have you ever walked past a fancy bakery window, spotted those colorful mini fruit tarts, and wondered if you could ever make something so beautiful at home? The good news is—you absolutely can! These little treats might look like they require professional skills, but they’re actually much easier to make than they appear.
Overview: Why You’ll Love These Mini Fruit Tarts
These mini fruit tarts are special because they combine three simple elements—a buttery crust, smooth custard filling, and fresh fruits—to create a dessert that looks like it came from a high-end bakery. The best part? You’ll only need about 2 hours from start to finish (including cooling time), and the active work is just about 30 minutes.
This recipe is perfect for beginners who want to impress their friends and family. The difficulty level is easy to medium—anyone who can follow simple instructions can make these beautiful tarts!
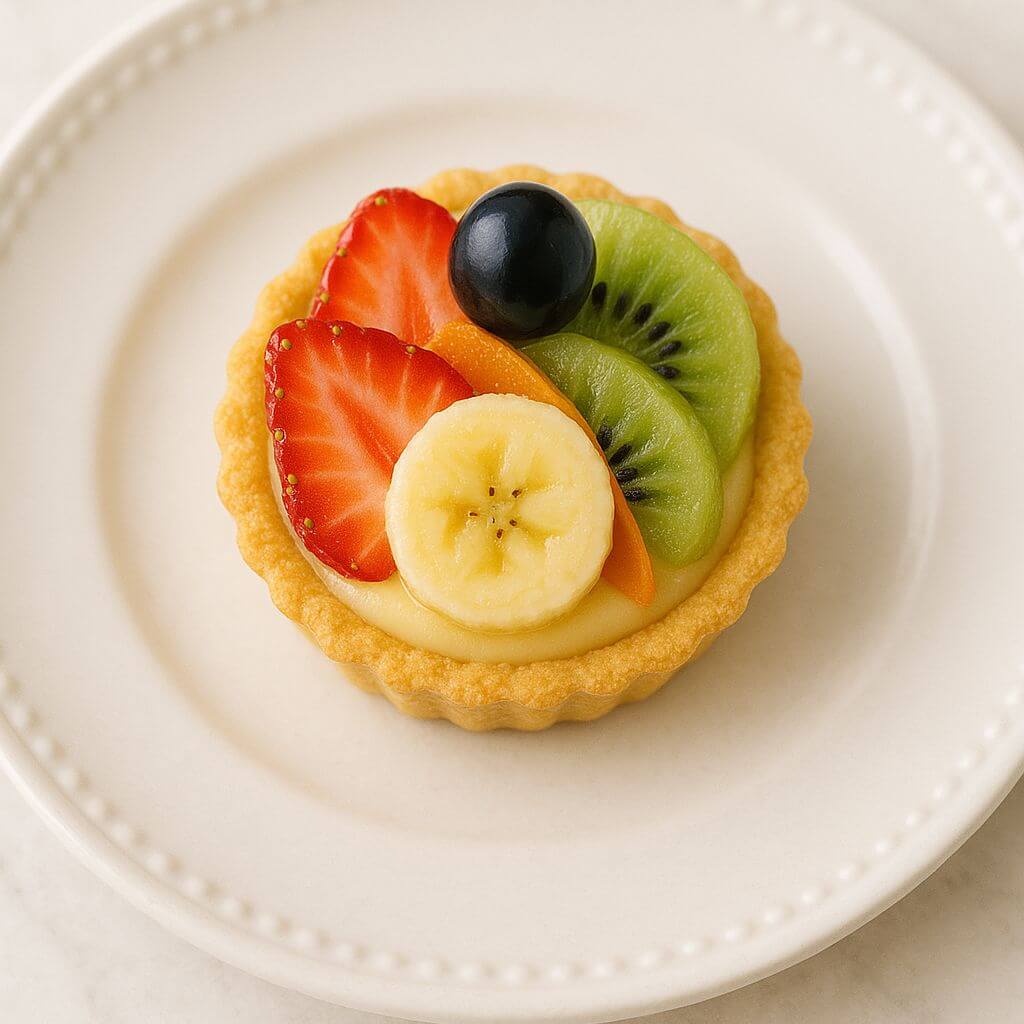
Table of Contents
Essential Ingredients: What You’ll Need
For the Tart Shells:
- 1½ cups all-purpose flour
- ½ cup powdered sugar
- ¼ teaspoon salt
- ½ cup (1 stick) cold butter, cut into small pieces
- 1 large egg yolk
- 1-2 tablespoons cold water
For the Custard Filling:
- 2 cups milk
- ½ cup sugar
- 4 egg yolks
- ¼ cup cornstarch
- 2 teaspoons vanilla extract
- 2 tablespoons butter
For the Topping:
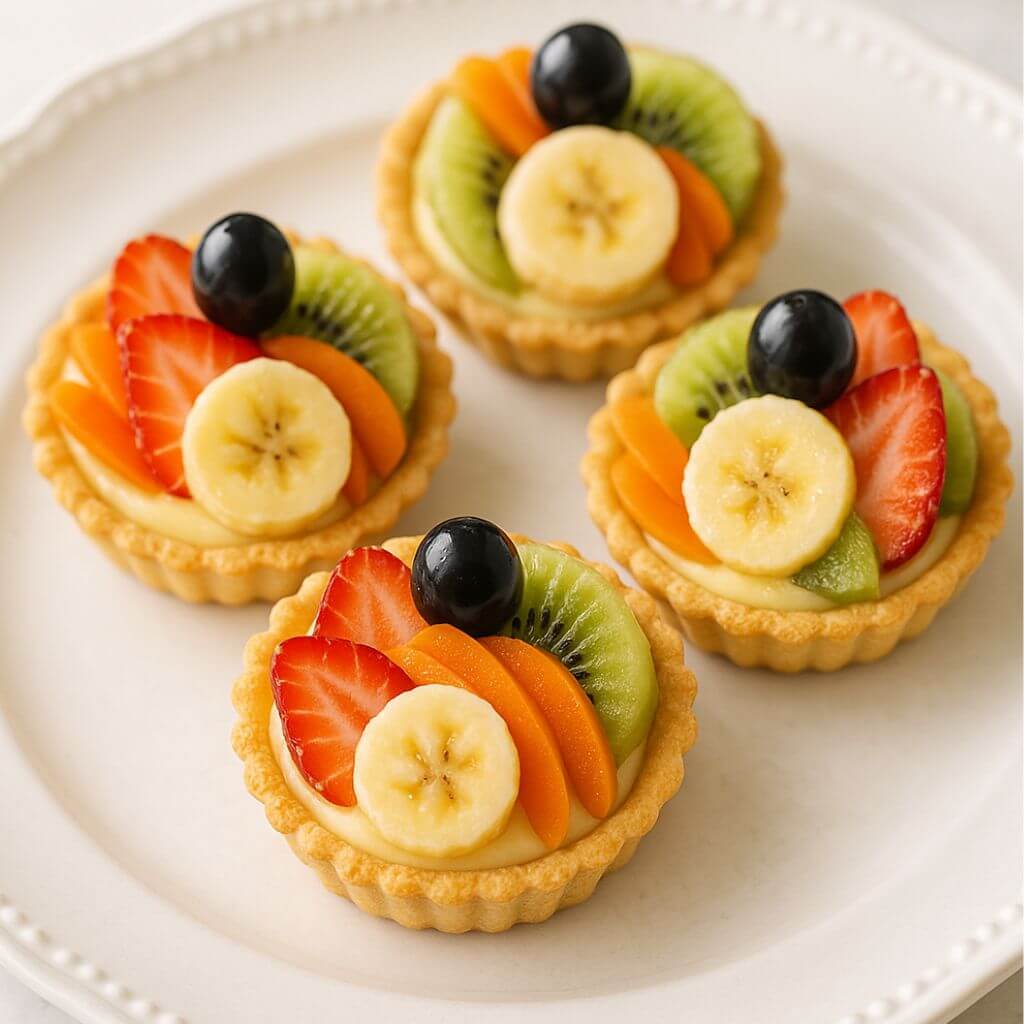
- 2-3 cups fresh fruits (strawberries, blueberries, kiwi, raspberries, mandarin oranges)
- ¼ cup apricot preserves (for the glaze)
- 1 tablespoon water
Why These Ingredients Matter
The Crust: The combination of butter, flour, and sugar creates a crisp, cookie-like shell that holds everything together. The cold butter is key for a flaky texture.
The Custard: Egg yolks give the custard its rich flavor and yellow color, while cornstarch helps it thicken to the perfect consistency.
The Fruits: Fresh fruits add color, natural sweetness, and a healthy touch to balance the richness of the custard and crust.
The Glaze: Apricot preserves create a beautiful shine on the fruits and help preserve their freshness.
Substitutions and Variations
- Flour: You can use gluten-free flour blend if you have dietary restrictions.
- Butter: Plant-based butter works for a dairy-free option, though the texture may be slightly different.
- Milk: Almond, coconut, or oat milk can replace regular milk for a dairy-free custard.
- Sugar: Reduce the amount for a less sweet version, or try coconut sugar for a different flavor.
- Fruits: Use any fruits that are in season! Peaches, mangoes, grapes, and blackberries all work wonderfully.
Step-by-Step Instructions: Making Your Mini Fruit Tarts
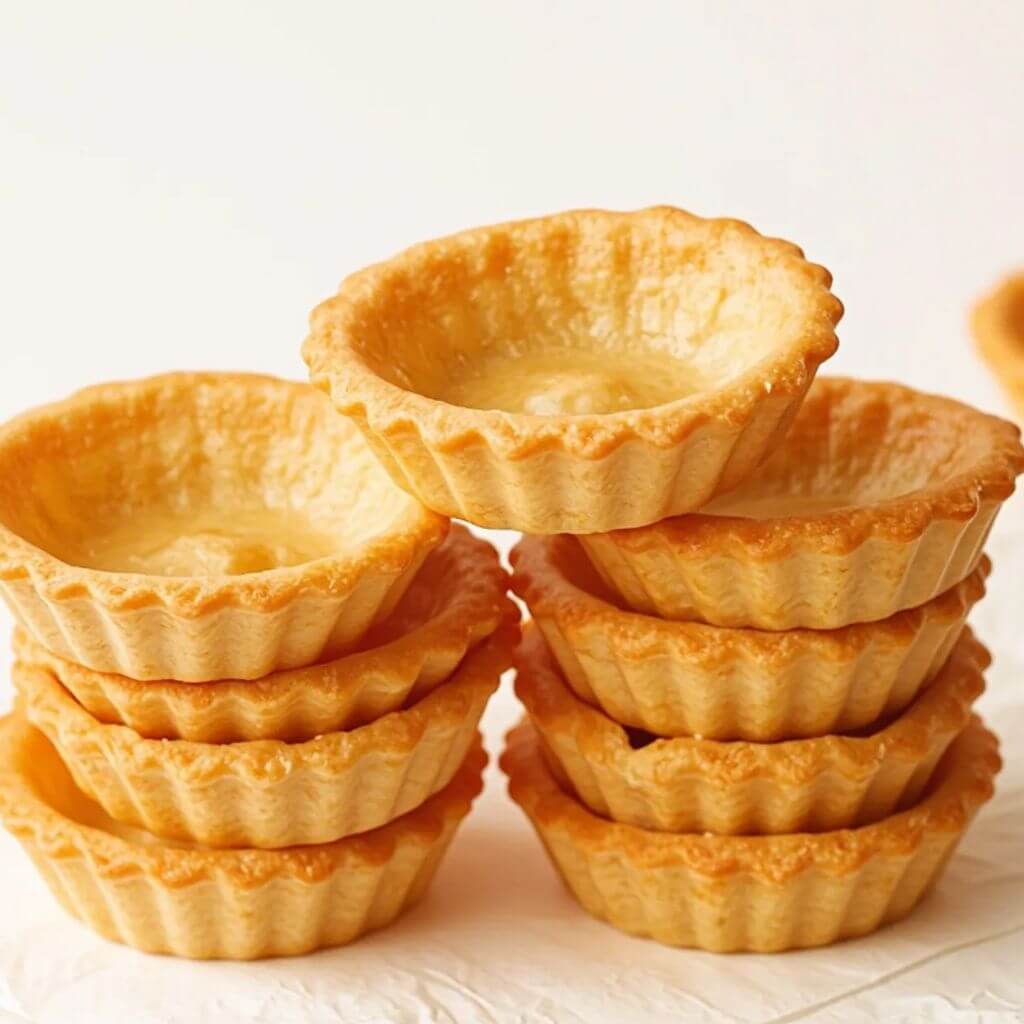
Step 1: Prepare the Tart Shells
- Mix dry ingredients: In a large bowl, whisk together the flour, powdered sugar, and salt.
- Cut in the butter: Add the cold butter pieces and use a pastry cutter or your fingers to work it into the flour mixture until it looks like coarse crumbs.
- Add wet ingredients: Mix in the egg yolk and add cold water, one tablespoon at a time, until the dough comes together when pressed.
- Form the dough: Gather the dough into a ball, flatten it into a disk, wrap in plastic wrap, and chill in the refrigerator for 30 minutes.
- Prepare tart pans: Lightly grease 12 mini tart pans (about 3 inches across).
- Roll and cut: After chilling, roll out the dough on a floured surface to about ⅛ inch thickness. Cut circles slightly larger than your tart pans.
- Form shells: Gently press the dough circles into the tart pans, trimming any excess from the edges.
- Blind bake: Prick the bottoms with a fork, line with parchment paper, fill with pie weights or dried beans, and bake at 375°F for 15 minutes. Remove the weights and parchment, then bake for another 5-7 minutes until golden. Let cool completely.
Tips:
- Keep everything cold! Cold butter creates flaky layers in the crust.
- Don’t overwork the dough, or it will become tough.
- If you don’t have mini tart pans, you can use a muffin tin.
Step 2: Make the Custard Filling
- Prepare egg mixture: In a medium bowl, whisk together egg yolks, ¼ cup of the sugar, and cornstarch until smooth.
- Heat milk: In a saucepan, combine the milk with the remaining sugar and bring to a simmer over medium heat.
- Temper the eggs: Slowly pour about half of the hot milk into the egg mixture while whisking constantly.
- Cook the custard: Pour the egg-milk mixture back into the saucepan and cook over medium heat, whisking continuously, until it thickens (about 2-3 minutes).
- Finish the custard: Remove from heat and stir in vanilla extract and butter until smooth.
- Cool: Transfer to a bowl, cover with plastic wrap directly on the surface (to prevent a skin from forming), and refrigerate until completely cool (about 1 hour).
Tips:
- Whisk constantly to prevent lumps in your custard.
- Strain the finished custard through a fine-mesh sieve if you notice any lumps.
- The custard should be thick enough to hold its shape when spooned.
Step 3: Prepare the Fruits
- Wash and dry: Thoroughly wash all fruits and pat them dry with paper towels.
- Cut fruits: Slice strawberries, kiwis, and any larger fruits into thin, even slices. Leave small berries whole.
- Arrange for efficiency: Sort your cut fruits by color and type so they’re ready for assembly.
Tips:
- Choose ripe but firm fruits that will hold their shape.
- Pat fruits completely dry to prevent them from making the tarts soggy.
- Cut fruits just before assembly to keep them fresh and bright.
Step 4: Assemble the Tarts
- Fill the shells: Spoon or pipe the cooled custard into each tart shell, filling them about ¾ of the way.
- Arrange fruits: Place your cut fruits on top of the custard in any pattern you like. Start from the outside and work your way in for a professional look.
- Prepare the glaze: In a small saucepan, heat the apricot preserves with 1 tablespoon of water until thin and smooth.
- Apply the glaze: Using a pastry brush, gently brush the thinned preserves over the fruits to give them a shiny finish and help preserve their freshness.
Tips:
- For a professional look, place fruits in a circular pattern or create a flower design.
- A piping bag makes filling the shells neater and easier.
- If you’re short on time, you can use a store-bought fruit tart glaze.
Step 5: Chill and Serve
- Final chill: Refrigerate the assembled tarts for at least 30 minutes before serving.
- Garnish (optional): Just before serving, add a small mint leaf, a dusting of powdered sugar, or a tiny dollop of whipped cream.
- Serve: Remove tarts from the refrigerator about 10 minutes before serving for the best flavor and texture.
Tips:
- These tarts are best enjoyed the same day they’re made, but can be prepared up to 24 hours in advance.
- Serve slightly chilled but not cold for the best flavor experience.
Storage and Make-Ahead Tips
To keep your mini fruit tarts fresh and delicious, follow these storage guidelines:
Make-Ahead Options:
- Tart shells: Can be baked up to 3 days ahead and stored in an airtight container at room temperature.
- Custard: Can be made up to 2 days ahead and stored covered in the refrigerator.
- Assembled tarts: Best when assembled the same day as serving, but can be made up to 24 hours in advance.
Storage Tips:
- Short-term: Store assembled tarts in the refrigerator, loosely covered with plastic wrap, for up to 2 days.
- Freezing: The baked unfilled tart shells can be frozen for up to 1 month. The custard doesn’t freeze well.
- Reviving: If the tart shells lose their crispness, you can reheat them in a 300°F oven for 5 minutes and then cool before filling.
Remember that fresh fruit tarts are best enjoyed soon after they’re made. The longer they sit, the more likely the crust will soften and the fruits will release juices.
Recipe Variations: Get Creative!
Once you’ve mastered the basic mini fruit tart recipe, try these fun variations:
1. Chocolate Lover’s Tart
- Add 2 tablespoons of cocoa powder to the tart dough
- Swap the vanilla custard for chocolate pastry cream (add 4 oz melted chocolate to the custard)
- Top with berries and chocolate shavings
2. Tropical Twist
- Add 1 teaspoon lime zest to the crust
- Use coconut milk instead of regular milk in the custard
- Top with mango, pineapple, and kiwi
- Sprinkle with toasted coconut flakes
3. Lemon Berry Delight
- Add 1 tablespoon lemon zest to the custard
- Top with mixed berries
- Use lemon curd as a thin layer between the custard and fruit
4. Nutty Crust Option
- Add ¼ cup finely chopped nuts (almonds, pecans, or hazelnuts) to the crust dough
- Top the finished tarts with a sprinkle of the same nuts
5. No-Bake Version
- Use store-bought shortbread cookies as the base
- Press a mixture of crushed cookies and melted butter into the tart pans
- Chill to set before filling with custard and fruit
Conclusion: Time to Enjoy Your Bakery-Quality Dessert!
Now that you’ve learned how to make these beautiful mini fruit tarts, it’s time to enjoy the fruits of your labor! Don’t be afraid to experiment with different fruit combinations, custard flavors, or crust variations. The best part about making these at home is that you can customize them exactly to your taste.
These mini fruit tarts are perfect for special occasions, dinner parties, or simply as a weekend treat for yourself and your family. The bright colors of the fresh fruit make them as beautiful to look at as they are delicious to eat.
FAQs:
Can I make these tarts without dairy?
Yes! You can use plant-based butter in the crust and coconut milk or almond milk in the custard. The texture might be slightly different, but they’ll still be delicious.
Why did my custard turn lumpy?
This usually happens when the eggs cook too quickly. To fix lumpy custard, strain it through a fine-mesh sieve. To prevent lumps, whisk constantly and make sure to temper the eggs by slowly adding hot milk.
Can I use frozen fruits?
Fresh fruits work best for these tarts. Frozen fruits tend to release too much liquid as they thaw, which can make your tarts soggy. If you must use frozen, thaw and drain them very well first.
How do I prevent a soggy crust?
Make sure to blind bake the crust until it’s fully cooked and golden. Let it cool completely before adding the custard, and don’t assemble the tarts too far in advance.
Are these mini fruit tarts healthy?
While they contain sugar and butter, these tarts also provide nutrients from the fresh fruits. They’re a better choice than many desserts because they contain less sugar and include fresh fruit. Enjoy them in moderation as part of a balanced diet!
Can I use a different glaze than apricot preserves?
Absolutely! Apple jelly, orange marmalade (strained), or even warmed honey can work as glazes. Choose something with a mild flavor that won’t overpower the fruits.
How far in advance can I make these for a party?
For the best quality, bake the shells and make the custard the day before. Store them separately, then assemble the tarts with fresh fruit 2-3 hours before serving.
Can I make one large tart instead of minis?
Yes! This recipe will make one 9-inch tart. The baking time for the crust will increase to about 25-30 minutes total.
What if I don’t have tart pans?
A muffin tin works great for mini tarts! You can also use small ramekins or even form free-standing tart shells by molding the dough over the back of a muffin tin.
How do I get my fruits to look so perfect on top?
Start by arranging fruits in a pattern around the outside edge and work your way in. Place similar sized pieces next to each other and alternate colors for visual appeal. Practice makes perfect!